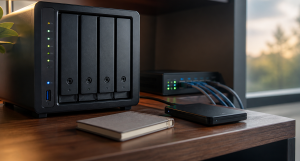
The 2026 Self-Hosted Starter Stack: What People Actually Run
 Tech Guru
A dependable self-hosted starter stack is not exotic: one small server, a sane container pattern, private remote access through a Virtual Private Network (VPN), a reverse proxy for selected Hypertext Transfer Protocol Secure (HTTPS) services, Domain Name System (DNS), monitoring, and backups before the app sprawl starts.
Docker Compose remains the practical default for many small self-hosted stacks. Pair it with clear volume mapping, a backup plan, private admin access, and one or two apps people actually use.
Design principle: Build the platform before adding apps: access, DNS, backups, updates, and monitoring should exist before the twentieth container.
The Decision
| Layer | Good Default | Why |
|---|---|---|
| Host | Proxmox virtual machine (VM) or bare-metal Debian/Ubuntu | Simple enough to operate and widely documented. |
| Runtime | Docker Compose | Readable app definitions and repeatable deployments. |
| Remote admin | Tailscale or WireGuard | Private access before public exposure. |
| HTTPS | Caddy, Nginx Proxy Manager (NPM), or Traefik | Only for apps that need browser access. |
| Backups | Restic, Proxmox backups, a NAS target, and an offsite copy | Self-hosted means you own recovery. |
Choose the Host Boundary First
Use bare-metal Debian or Ubuntu when the machine has one clear job and you want the fewest layers. Use Proxmox when you need separate VMs, snapshots before risky host changes, hardware experiments, or clean separation between household-critical services and disposable apps. Do not run Docker directly on the Proxmox host; keep the hypervisor focused on virtualization and put the container runtime in a VM.
For a first stack, one Linux host with 16 GB of RAM, solid-state storage for application data, and wired Ethernet is a reasonable category to evaluate, not a performance guarantee. Photos, document optical character recognition, media transcoding, local artificial intelligence, and large databases can change the requirement quickly. Size from the applications' current documentation and your data, then keep enough free memory and disk space for updates, logs, and recovery work.
- Give the server a DHCP reservation and a documented DNS name.
- Install security updates and enable a host firewall before adding applications.
- Create a non-root administrator account with key-based Secure Shell (SSH) access.
- Keep the Docker API socket local. Membership in the
dockergroup is effectively privileged access to the host. - Record disk layout, encryption recovery material, firmware settings, and how to boot rescue media.
Directory Pattern
Specific paths matter less than consistency. Keep Compose files, secret files, bind mounts, named volumes, and backup targets documented. Named volumes are valid persistent storage, but the backup job must identify and restore them explicitly. Avoid anonymous volumes for data you care about because they are easy to orphan or omit from recovery notes.
/opt/stacks/
  immich/
    compose.yaml
    .env
  paperless/
    compose.yaml
    .env
  caddy/
    Caddyfile
    compose.yaml
/srv/appdata/
  immich/
  paperless/
/srv/backups/
Do not commit .env, database passwords, API keys, or private keys to a public repository. Docker Compose supports secrets mounted as files for images that can consume them. Environment variables remain common, but can appear in process inspection, rendered configuration, support bundles, or logs. Restrict file permissions and know which values must be rotated after a backup or repository leak.
A Repeatable Deployment Workflow
Start one application at a time. Read its official Compose example, replace floating latest tags with a tested version tag or image digest where practical, map only required ports, and use a dedicated network for application-to-database traffic. If a reverse proxy runs on the same host, publish an application to 127.0.0.1 when the design allows it instead of every network interface.
cd /opt/stacks/example
docker compose config --quiet
docker compose pull
docker compose up -d
docker compose ps
docker compose logs --tail=100
config --quiet checks whether the Compose model can be parsed without printing the rendered configuration. pull downloads the referenced images but does not replace running containers. up -d reconciles the stack in the background. ps shows state and published ports, while logs provides the first failure evidence. Review release notes and application-specific migrations before running these commands against an existing database.
Compose files are trusted input. Before running a file from the internet, inspect host bind mounts, privileged, device access, host networking, added capabilities, and Docker socket mounts. Prefer an unprivileged application user, drop Linux capabilities the image does not need, and use read-only filesystems where the application supports them. Container isolation reduces some risk; it does not make an untrusted image safe or turn one host into separate security zones.
Back Up Data, Then Prove Restore
Back up four different things: deployment definitions, secrets, persistent application data, and the information needed to rebuild the host. A copied Compose file contains none of the records inside PostgreSQL, photos in a bind mount, or encryption keys held elsewhere. Use the application's documented database dump or quiesce method; copying a live database directory may produce a backup that exists but cannot be restored consistently.
- List every volume and bind mount with its owner, purpose, size, and backup method.
- Send versioned backups to storage outside the host. Keep another copy offline or offsite for data that cannot be recreated.
- Record retention and alert when a job is missing, too small, or too old.
- Restore into an isolated directory or temporary VM. Start the application on a non-production address and verify records, files, users, and login.
- Write the recovery time and any manual steps. A successful backup job is not evidence of a successful restore.
Updates, Verification, and Rollback
Before an update, capture the current image reference, export or snapshot data using a method appropriate to the application, and read the release notes for migrations or breaking changes. Update one stack, not the entire host. Keep automatic update tools in notification-only mode until you know which applications are safe to replace unattended.
- Availability: the health check is healthy, the login page loads through the normal DNS and HTTPS path, and an external monitor sees the expected status.
- Data: create and retrieve a disposable record or file, then confirm the database and storage path are the intended ones.
- Access: an authorized VPN client succeeds; a guest client and the public internet cannot reach admin ports.
- Resources: check disk free space, memory pressure, container restarts, and log growth after realistic use.
- Recovery: restore one stack from its documented backup without using the live application directory.
If an update fails before a database migration, restoring the previous image reference may be enough. After a one-way schema migration, an old image can damage or reject the new database; restore the pre-update database and application data together. If the whole VM must be rolled back, account for writes made after the snapshot. Stop dependents, preserve failure logs, and choose deliberately between rollback and forward repair.
Failure Signals Worth Alerting On
- Host or application health check unavailable for more than a brief restart window.
- Filesystem nearly full, backup repository unreachable, or no recent successful snapshot.
- Repeated container restarts, out-of-memory events, or database recovery loops.
- TLS certificate nearing expiry or DNS no longer returning the expected private address.
- Unexpected new published ports, privileged containers, or authentication failures.
Monitoring the dashboard from the same host is insufficient: it disappears with the failure it should report. Use at least one check from another device and route critical backup or outage alerts somewhere available when the server is down.
Starter Apps That Earn Their Keep
- DNS filtering such as Pi-hole or AdGuard Home.
- A dashboard or homepage for family-friendly links.
- Uptime monitoring.
- A backup job with alerts.
- Immich for photos after backups are proven.
- Paperless-ngx for documents.
- Jellyfin or Plex for media if storage and remote access are ready.
- Open WebUI and Ollama only after the base stack is healthy.
What to Avoid
- Running 25 apps before a single restore test.
- Exposing admin panels just because reverse proxying is easy.
- Running every app on
latestwith no rollback plan. - Leaving
.envfiles out of backups. - Letting app data live in mystery volumes.
Useful Gear and Buyer Notes
Affiliate disclosure: As an Amazon Associate, TechGeeks may earn from qualifying purchases. The product links below are buying references, not a requirement to buy a specific brand or seller. Verify compatibility, seller quality, warranty, and current specs before ordering.
| Need | Good Choice | Why It Fits | Affiliate Link |
|---|---|---|---|
| Starter host | Efficient mini PC with 16GB or 32GB of Random Access Memory (RAM) | Enough for a surprisingly useful self-hosted base. | Amazon: Intel N100/N305 mini PCs |
| Storage | Non-Volatile Memory Express (NVMe) solid-state drive (SSD) + NAS or backup disk | Fast app data plus a recoverable backup target. | Amazon: NVMe SSDs Amazon: Samsung T7 Shield 2TB Amazon: external backup drive |
| Network core | 2.5 Gigabit Ethernet (2.5GbE) switch | Improves NAS, backup, and media workflows. | Amazon: 2.5GbE switches |
| Power | UPS | Self-hosted services deserve clean shutdowns. | Amazon: CyberPower CP1500PFCLCD Amazon: APC BR1500MS2 |
| Security | Hardware security key | Protects DNS, Git, Cloudflare, and other admin accounts. | Amazon: hardware security key |
Common Mistakes
- Treating Docker Compose files as backups.
- Exposing dashboards and admin pages to the internet.
- Ignoring app databases during backup planning.
- Updating every container automatically without testing.
- Running everything on one host with no recovery notes.
What This Does Not Prove
This documentation-backed starter design does not prove that the example stack will meet your availability, security, performance, or recovery requirements. No throughput benchmark, penetration test, unattended upgrade, or full restore drill was performed for this article. Treat the commands as a planning baseline: pin the versions you approve, review each service's configuration, test restores with disposable data, and verify access controls from both trusted and untrusted networks before relying on the stack.
References
- Docker Compose Documentation
- Docker Compose Trust Model
- Docker Compose Secrets
- Docker Volumes
- NIST SP 800-190: Application Container Security Guide
- CISA StopRansomware Guide
- Proxmox Backup and Restore
- Caddy Automatic HTTPS
- Tailscale Subnet Routers
- Restic
Related TechGeeks Resources
- Docker Compose for Normal People
- NAS vs DAS vs Mini PC: Which Storage Setup Should You Actually Buy?
- Monitoring and Health Checks for a Plex and Arr Homelab
Final Thought
A good self-hosted starter stack is boring in the best way. It runs a few apps people use, recovers cleanly, and gives you confidence before you add the next shiny service.
This roadmap entry answers where a first self-hosted stack should draw its boundaries: Debian, Ubuntu, or Proxmox at the host layer; Docker Compose for services; private administration; selected HTTPS; monitored volumes; and restore-tested backups. It turns recurring community questions into a build order checked against the primary documentation linked above, rather than treating a list of popular apps as an operating plan.